
Thanks for buying our Magneto Mount! This device will allow you use of your Magnetospeed without being strapped to your barrel. In order to save on shipping cost, the mount is delivered unassembled. Please follow the instructions for assembly, threadlocker can be used if desired. All hardware is SAE, not metric. Requires 3/32, 1/8, and 5/32 Allen wrenches. Below you will find instructions for assembling your mount. After reading through the instructions, if you are still unsure, see our animated assembly video below.
Mount Assembly
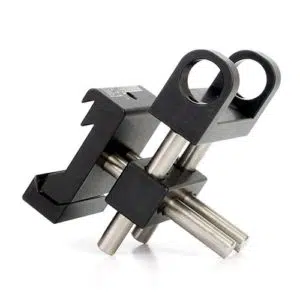
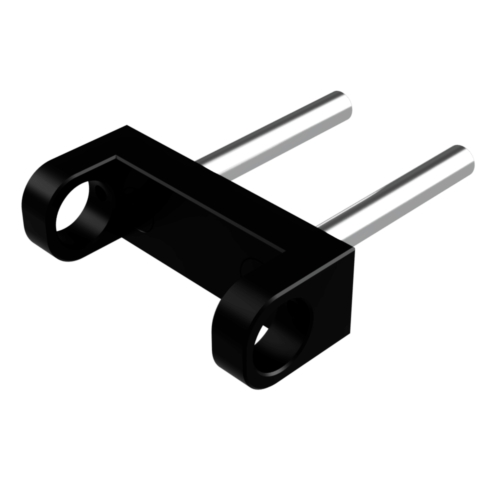
1) Using the chamfer head bolts, tighten the stainless steel adjustment rods into the Arca/Picatinny clamp. Adjustment rods will sit into counterbores, and chamfer head bolts should be flush after tightening.
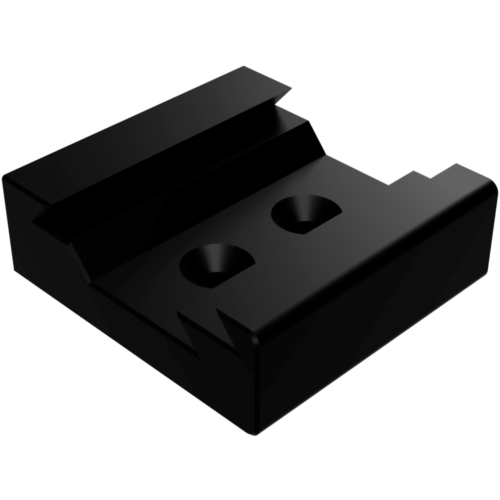
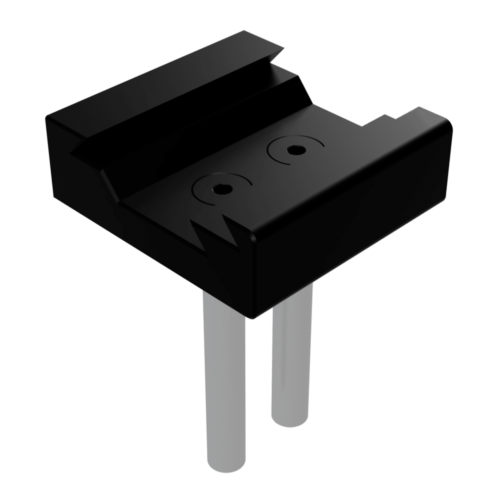
2) Repeat these steps for the rod holder section.
3) Insert adjustment rods from both sections into the rectangular block. All holes are pass through, so orientation shouldn’t matter.
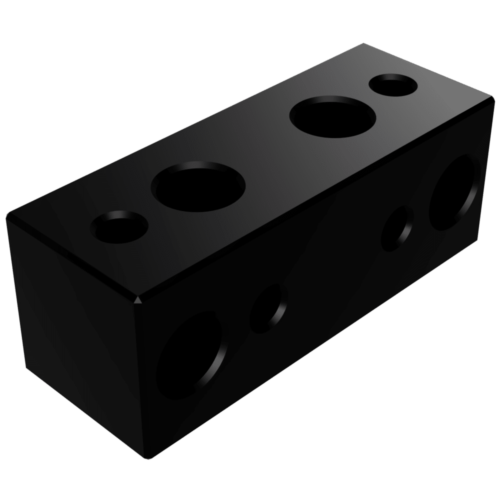
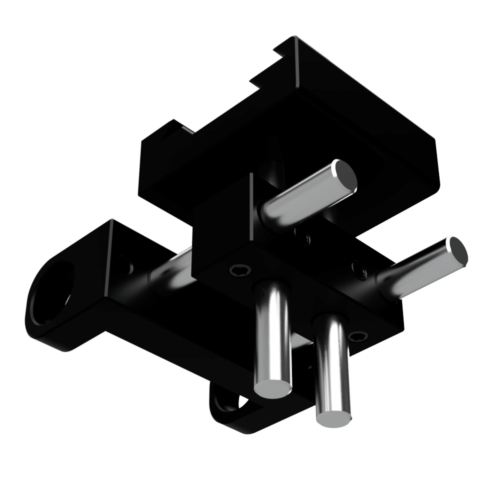
4) Use 1/4″ set screws to secure assembly.
5) Use 1/2″ set screws to secure the 5/8″ adjustment rod.
Installing the Magnetospeed Bayonet
This completes the Arca/Picatinny clamp section of the mount. Follow the instructions below to install your Magnetospeed on the 5/8″ adjustment rod.
- Remove the strap assembly from your bayonet. Place the printed square on the bottom of your bayonet with the smooth side touching the bayonet.
2) Using the 1″ 10-24 bolts, pass them through the bayonet and thread lightly into the square plate oriented in a manner to interface with the 5/8″ rod.
3) Install the bayonet and plate onto the rod and tighten until secure. Overtorquing WILL bend the bracket on the bayonet, tighten only until secure.
Now you are ready to collect data! Mount the Arca/Picatinny clamp onto your rifle, and using the X/Y axis adjustments to place your bayonet in line with your bore. Loosen the 1/2″ set screws to rotate your bayonet and adjust length to place the blast shield just beyond the muzzle. Not sure if you set it up right? Contact us at [email protected]
Gen III Magneto Mount Updates
There are two small design updates noted in this supplementary instruction sheet:
- Rather than shipping a 24” rod, we now have modular 12” sections that are threaded on both ends. This greatly eases shipping security, and also allows for 36” of rod for extremely long barrels. To link your rod sections together thread the included 5/16 set screw into the adjustment rod with a 5/32 allen wrench. Thread locker can be used if desired. Now you can attach two (or three) rods together, and tighten them with a wrench via the milled flats. Thread locker can be used if desired, although we recommend a low-medium strength if you plan to take these apart in the future.
- To mitigate bending the bracket on your Magnetospeed from overtightening, and provide a more secure grip on the adjustment rod, there is now a glass fiber filled nylon bracket attachment piece. This in conjunction with the billet bottom plate provide nearly complete surface contact with the adjustment rod, and as mentioned above will help provide support to the bracket itself. Look at the picture above a note your bolts pass through the bracket and glass nylon piece, then thread into the billet plate to capture the adjustment rod. Enjoy shooting with no POI shift! MKM